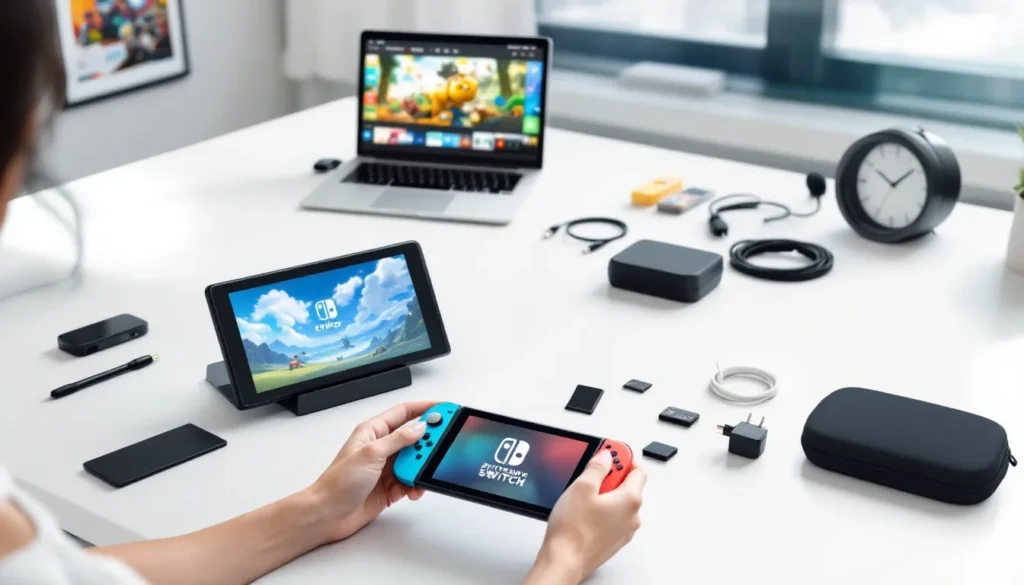
Whether you’ve just unboxed a shiny new Nintendo Switch or you’re setting up a second console for the household, getting everything configured correctly makes all the difference between a seamless process and frustrating troubleshooting sessions. The good news? A proper Nintendo Switch setup doesn’t require a degree in electrical engineering or hours of tinkering. This guide walks you through every step, from hardware assembly to account creation to network configuration, so you can spend less time fiddling with menus and more time actually gaming. By the end, your console will be fully optimized, your accounts linked, and you’ll be ready to jump into your first game or dive back into your backlog.
Key Takeaways
- A proper Nintendo Switch setup requires assembling hardware (console, Joy-Cons, dock), powering on the system, and configuring language and regional settings to optimize your gaming experience.
- Create a local user profile and link it to a Nintendo Account to unlock digital game purchases, online multiplayer, and cloud saves—essential features for a fully functional setup.
- Connect to 2.4GHz WiFi or use a USB Ethernet adapter for stable online play; wired connections eliminate lag and improve download speeds for serious gamers.
- Expand your console’s storage with a microSDXC card (64GB or larger) since the Switch’s internal storage fills quickly with digital game downloads.
- Configure parental controls and security settings, including a strong Nintendo Account password and admin PIN, to protect your library, save data, and prevent unauthorized purchases.
- Customize display brightness, audio output, and control settings based on your gaming environment and personal preferences for optimal comfort during handheld or docked play.
What You’ll Need Before You Start
Before you tear into that box, let’s make sure you’ve got everything necessary for a complete Nintendo Switch setup. Having the essentials on hand means you won’t be hunting around your house halfway through assembly.
Hardware and Accessories
The Switch itself comes with the core components you need: the dock, the tablet-style console, two Joy-Con controllers (one red, one blue for the standard model), wrist straps for those controllers, and the USB-C cable. You’ll also get the HDMI cable to connect the dock to your TV and an AC adapter rated at 39W. That’s the bare minimum to get playing, but don’t underestimate these basics, each piece serves a specific function in your Nintendo Switch setup.
The dock is where your console sits to display games on your television. The Joy-Cons are Nintendo’s unique wireless controllers, and they’re central to how the Switch works. The AC adapter powers everything, so keep it safe.
Optional Additions for Enhanced Gaming
Several accessories can seriously improve your experience, even if they aren’t strictly required. A microSD or microSDXC card (64GB or larger) is almost essential if you plan to download digital games, the Switch’s internal storage fills up fast. A carrying case protects your console during travel, which matters if you’re using the Switch’s handheld mode. A Pro Controller gives you a traditional gamepad feel for longer sessions, and honestly, once you go Pro, many games feel more comfortable.
For those diving into streaming, streaming equipment like a capture card or microphone becomes relevant, though that’s beyond the scope of basic setup. If you’re planning serious online play, a stable ethernet connection is gold, and Nintendo sells an official USB adapter for that. Those interested in streaming gameplay can explore Can You Stream on Nintendo Switch?, which covers the technical side in detail.
Unboxing and Initial Hardware Setup
Okay, the moment of truth: opening the box. Take your time here, there’s no rush, and you want to make sure nothing is damaged.
Assembling the Console and Joy-Cons
First, remove all components from the box and lay them out on a clean surface. The console itself is the black tablet-like device in the center. Those two controller pieces on the sides? Those are your Joy-Cons, and they slide onto the console’s left and right rails with a satisfying click. Make sure the small button on the back of each Joy-Con is pressed while you slide them on, this button releases the controller when you want to detach them.
Once the Joy-Cons are attached, grab the wrist straps. These loop through the bottom of each Joy-Con and keep them secure during handheld play. Slip the left strap onto the left Joy-Con and the right onto the right. This step might feel fussy, but it prevents you from accidentally dropping a controller during an intense gaming session.
If you got a carrying case with your bundle, now’s a good time to get familiar with it. Some cases have specific slots for each component. The console with attached Joy-Cons goes in the main compartment, and accessories go in the zippered pockets.
Connecting Power and Charging Devices
Locate the USB-C port on the console, it’s at the bottom center when the console is in portrait orientation. Plug the included USB-C cable into this port. The other end goes into the wall adapter (the 39W power supply). Push the adapter into a wall outlet.
You’ll notice the console has a small indicator light on the bottom right of the screen. When you plug it in, you might see a faint light, but don’t panic if nothing happens immediately. The battery might be completely drained from storage or shipping. Leave it charging for at least 30 minutes before your first power-on.
Powering On and System Configuration
After a solid charge, it’s time to turn your Nintendo Switch setup on for the first time.
Starting Your Nintendo Switch for the First Time
Press the power button once. It’s located on the top of the console, on the left side. The screen should light up after a moment, and you’ll see the Nintendo logo followed by a system introduction screen. The console will boot up to a welcome screen with language options, this is your entry point to the system configuration process.
If you’re not planning to connect to a TV immediately, the console is now ready for handheld mode. The screen has a 6.2-inch display (or 7 inches if you went with the OLED model), so games look solid in handheld. If you want to use the TV, place the console in the dock: with the console held upright (the screen facing away from you), slide it into the dock while the USB-C port aligns with the dock’s connector. Your TV should display the Switch’s home screen within seconds. Make sure the TV is set to the correct HDMI input, usually HDMI 1 or HDMI 2, depending on how many devices you have connected.
Selecting Language and Regional Settings
The system will ask you to select your language and region. Tap the language you want, English (US), English (UK), Spanish, French, German, Italian, Japanese, etc. Next, you’ll choose your region (United States, Canada, Europe, Japan, etc.). These settings affect the eShop region, game releases, and which versions of titles are available to you. Choose carefully: you can’t change the console’s region after this step without a factory reset, which wipes everything.
After language and region, you’ll be asked about internet connection. You can skip this for now and set it up later, or connect immediately if you’ve got WiFi details handy. The setup process is straightforward, it’s basically the same WiFi connection process you’d use on any device. You’ll see a list of networks, tap yours, enter the password, and you’re connected. If your WiFi password is long or complex, take your time typing it.
Creating and Managing User Accounts
Every person who plays on the Switch needs a user account. This is how Nintendo tracks game progress, saves, and online play credentials.
Setting Up Your Primary Nintendo Account
After region setup, you’ll be prompted to create a user profile. This is different from a Nintendo Account, so let’s be clear on the distinction: the user profile is local to your console, while a Nintendo Account is your online identity linked to Nintendo’s servers. You’ll start by creating the local profile.
Give your profile a name, this can be anything (your real name, a gamertag, whatever). You’ll also choose an avatar, which is a cute little character icon that represents you on the home screen. Nintendo provides a bunch of pre-made avatars, or you can take a photo of yourself and use that. Once you’ve created your local profile, the next step is linking it to an actual Nintendo Account.
To link a Nintendo Account, you’ll need to go to the eShop or sign up online at Nintendo’s account page. If you don’t already have a Nintendo Account (perhaps you’re new to Nintendo), you’ll create one with an email address and password. Once created, go back to your Switch, navigate to your profile settings, and link that Nintendo Account. This step is crucial if you plan to buy games digitally, play online, or use cloud saves. Without a linked Nintendo Account, you’re pretty limited.
For those setting up the console for the first time, it’s worth noting that this same account process applies whether you’ve picked up a standard model, an OLED variant, or even checking out Nintendo Switch Animal Crossing Bundle options or other bundle editions, the account setup remains the same across all models.
Adding Multiple User Profiles
If multiple people will play on this console, each person should have their own profile. From the home screen, go to System Settings > Users > Add User. Repeat the process: choose a name, pick an avatar. You can create up to 8 user profiles per console, and each can be linked to its own Nintendo Account.
This is particularly useful for families. Parents can set up parental controls on a per-profile basis, restricting certain games or features for kids’ accounts while leaving the adult account unrestricted. Each profile keeps its own saves, so Mario Kart progress for one player won’t interfere with another’s.
Connecting to the Internet and Networks
A connected Switch opens up online multiplayer, digital game purchases, cloud saves, and system updates. Getting the network right is essential for a fully functional Nintendo Switch setup.
WiFi Configuration and Troubleshooting
If you skipped WiFi during the initial setup, you can add it anytime. Go to System Settings > Internet > Internet Settings, and you’ll see a list of available WiFi networks. Select yours, tap “Connect,” and enter your password. The Switch will test the connection and let you know if it’s successful. If it fails, double-check the password, the most common issue is a typo. WiFi passwords are case-sensitive, so “MyPassword” isn’t the same as “mypassword.”
If your WiFi is on a 5GHz band, the Switch might struggle. The Switch works best on 2.4GHz WiFi. Many modern routers broadcast both bands simultaneously, if you’re having trouble, check your router’s settings and make sure 2.4GHz is enabled. Your router’s manual or your ISP’s documentation will show how to do this. Some routers label this as “dual-band” operation.
For those moving between locations or dealing with older WiFi equipment, connection can be finicky. If you’re consistently dropping signal or getting slow downloads, your router might be getting old. Modern 802.11ac or 802.11ax (WiFi 6) routers handle gaming traffic much better than older 802.11n equipment. If you’re troubleshooting network issues and want deeper tech guidance, resources like How-To Geek have solid router troubleshooting guides.
Using Ethernet for Stable Online Gaming
For competitive gaming or streaming, WiFi just isn’t as reliable as a wired connection. Nintendo sells a USB-to-Ethernet adapter (officially called the “Nintendo Switch Online Ethernet Adapter”) that connects to the dock’s USB port, and then you run an ethernet cable from your router to the adapter. Once plugged in, the Switch automatically recognizes the connection, no configuration needed.
If you’re serious about online play, especially in games with tight timing requirements, a wired connection is the difference between smooth gameplay and frustrating lag. Ethernet is also more stable for downloading large game files, though WiFi works fine for most people. The ethernet adapter costs around $30, which is a small investment for serious players.
Installing Games and Updates
This is where your Nintendo Switch setup moves from “functional” to “actually usable.” Getting games onto your console is straightforward, but there are a few paths depending on whether you prefer digital or physical copies.
Purchasing and Downloading Digital Titles
The eShop is Nintendo’s digital storefront. From the home screen, tap the eShop icon, search for a game, and select “Purchase.” You’ll be prompted to confirm with your Nintendo Account, and the game will begin downloading in the background. The Switch can download while in sleep mode, so you can queue up a game, put the console away, and come back hours later to find it’s ready to play.
Prices on the eShop are usually the same as physical copies, though sales happen regularly. Games like The Legend of Zelda: Tears of the Kingdom or Super Mario Bros. Wonder are full-priced ($60 USD), while indie titles run anywhere from $5 to $30. Keep an eye out for seasonal sales, Black Friday, holiday sales, and publisher-specific events offer discounts. Those hunting for deals can Black Friday Switch deals to catch sales throughout the year.
One advantage of digital downloads: you can share games with other user profiles on the same console. Set the console as your “primary console” in your account settings, and other users can play any game you’ve purchased.
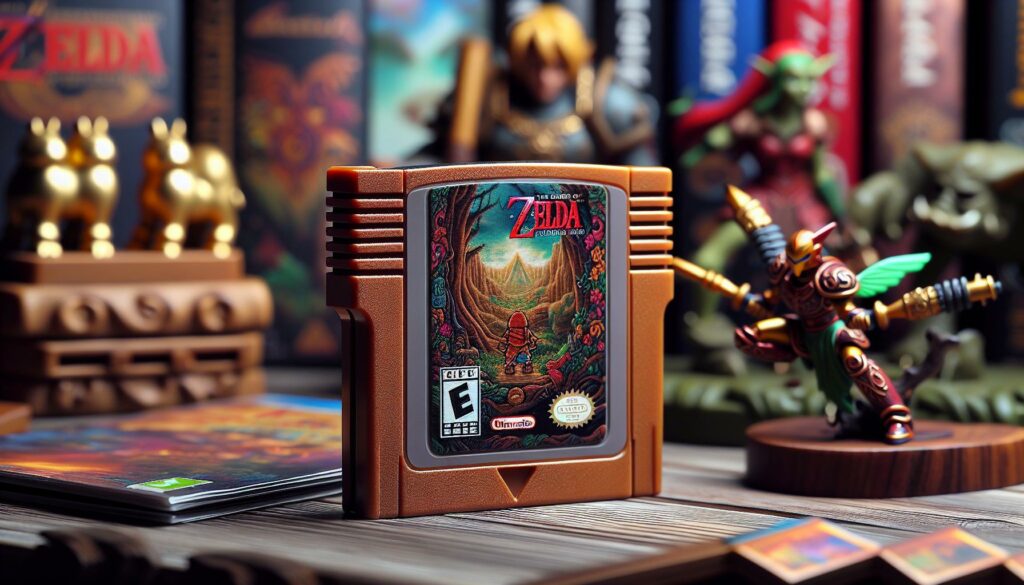
Using Physical Game Cartridges
Physical games come on tiny cartridges (they’re about the size of a postage stamp). Slot a cartridge into the cartridge slot on the top of the console. The Switch reads it immediately, and you’re ready to play. No download required. Physical games often have better resale value and take up zero storage space on your console, which matters if you’re a collector or plan to play dozens of titles.
The tradeoff: physical games cost slightly more at retail, and you have to physically swap cartridges if you want to play different games. For most players, a mix of digital and physical works well, buy exclusives and frequent-play titles digitally, and pick up AAA releases physically. Those comparing different Switch models should know that all models (standard, OLED, Lite) accept the same cartridges.
Managing Storage and Expandable Memory
The Switch’s internal storage is 32GB (or 64GB on the OLED model), but the operating system takes a chunk. Real usable space is around 26GB standard, less on the original. If you plan to download more than a handful of games, you’ll need a microSD card. A 256GB microSDXC card costs about $25-40 and gives you room for 50-100 digital games depending on file size. Modern AAA titles can be 15-20GB each, so storage fills fast.
To install a microSD card, locate the small slot on the back of the console (it’s tucked behind the kickstand). Power off the console first. Gently push the card into the slot until it clicks, then power back on. The Switch recognizes it automatically. You can now download games directly to the card. If you ever need to transfer games around, from internal storage to the card, there’s a menu in Storage under System Settings. Don’t eject the card while the console is on or games are running from it, or you’ll risk corruption. Shutdown before swapping or removing it.
Customizing Your Gaming Experience
Stock settings work fine, but tweaking a few options makes gaming noticeably better. This is where personal preference kicks in, what’s perfect for one player might be wrong for another.
Adjusting Display and Audio Settings
Go to System Settings > TV Settings (for docked mode) or Screen Settings (for handheld). Resolution options depend on your console: the standard Switch and OLED model support up to 1080p when docked, while the Lite is handheld-only. Most TVs handle this automatically, but if you’re seeing weird stretching or black bars, check that your TV is set to “1080p” or “Auto” resolution in its own settings.
For brightness, the OLED model has a gorgeous, vibrant display by default. The standard model’s LCD screen benefits from increased brightness in dimly lit rooms. Adjust handheld brightness in Screen Settings > Brightness. During battery-heavy sessions, lower brightness extends playtime, every bit helps when you’re away from a charger.
Audio-wise, the Switch’s speakers are serviceable but not stellar. For handheld play, most players eventually grab a good pair of wireless earbuds, they’re far more comfortable than holding the console with built-in audio. For docked play, the audio goes through your TV speakers unless you’ve connected a soundbar or headphones via the 3.5mm headphone jack (which exists on all models). In System Settings, you can select between TV speakers, headphones, or other audio devices.
Brightness and audio preference matter in games. A shooter like Fortnite benefits from higher brightness for spotting enemies and decent audio for directional cues. A relaxation game like Animal Crossing plays fine with lower brightness and casual audio. Adjust based on what you’re playing and your environment.
Personalizing Controls and Joy-Con Configuration
Most games use the default Joy-Con setup, but some games let you customize button mapping. A few indie titles let you remap controls entirely. Check individual game settings if the default controls feel unnatural.
For the Joy-Cons themselves, you can test them and calibrate them in System Settings > Controllers > Calibrate Control Sticks. If stick drift becomes an issue (a common problem where the analog stick registers input without you touching it), Nintendo offers free repairs if the console is under warranty. For out-of-warranty repairs, they’ll charge a fee, but it’s often cheaper than buying new controllers at full price, GameStop has replacement controller options if you need them urgently.
The Pro Controller is worth mentioning again for customization: many games support button remapping directly in the Pro Controller’s settings, and the trigger sensitivity can be tweaked in some titles. If you play a lot of first-person shooters or fighting games, a quality controller makes a real difference.
Securing Your System and Parental Controls
Security isn’t the most exciting part of setup, but it’s important. You’ve got payment methods linked to your Nintendo Account, game libraries, and save data to protect.
Setting Up a Secure PIN and Password
From System Settings > Users > Your Profile > Set a PIN, you can create a 4-digit PIN that prevents others from accessing your profile. This is useful in a household with kids or guests. It’s not Fort Knox security (4 digits isn’t exactly Fort Knox), but it stops casual access.
Your actual Nintendo Account password is far more important. Make it strong: at least 12 characters mixing uppercase, lowercase, numbers, and symbols. Don’t use the same password you use for email or banking. If someone gains access to your Nintendo Account, they could buy games on your dime or lock you out of your own account. Nintendo has two-factor authentication available, enable it. It requires you to verify logins from new devices using an email or authenticator app, and it’s a huge security boost.
You can also restrict who can purchase games on the console. Go to System Settings > Parental Controls > Restrictions and set an admin PIN. Once set, any user (including you, if you forget the PIN) needs the PIN to change settings or make purchases. This is especially useful if kids have access, it prevents accidental $50 game purchases.
Configuring Parental Controls for Family Gaming
Parental Controls are separate from the PIN: they’re content-based restrictions. Go to System Settings > Parental Controls > Parental Controls Settings, set an admin PIN (different from your user PIN for extra security), and configure what you want.
You can restrict games by rating (ESRB rating filters keep out games rated M for Mature, for example). You can restrict YouTube, the eShop, online play, and voice chat. You can set daily playtime limits and time-specific access (no gaming past bedtime, for example). For each user profile, you can set these limits independently.
The restrictions are serious, a kid can’t just override them without the admin PIN. If you set a 2-hour daily limit, the console will stop letting them play once the limit hits (with a warning beforehand). If you restrict online multiplayer for a profile, that user can’t access online features even if they know the game supports it.
For families with multiple kids, this is gold. The youngest kid gets heavy restrictions, while a teenager might get fewer. All kids get limits, but older kids’ limits are looser. You configure it once and it sticks. Those wanting more detailed guidance on family gaming can explore resources like GamesRadar+ for parental advice on specific games and content ratings.
Conclusion
You’ve now walked through every essential step of a complete Nintendo Switch setup. From unboxing and assembly through account creation, network configuration, game installation, and security settings, your console is ready to deliver what it promises: gaming anywhere, anytime.
The beauty of the Switch is that setup doesn’t demand perfection. You can adjust settings later if something isn’t quite right. Realize you hate your chosen region? There’s a workaround (factory reset). Prefer ethernet over WiFi? Grab an adapter and swap today. Want to change your avatar or add more user profiles? It’s in the settings, always available.
What matters now is that your console is on, connected, and secured. Whether you’re a casual player queuing up Nintendo Switch Sports, a completionist tackling Zelda, or someone just looking for fun with family, the foundation is solid. The rest is just discovering which games speak to you and logging those hours. Enjoy the journey.