Your Nintendo Switch account is the gateway to everything the console offers, digital games, online multiplayer, save data backup, and exclusive features. Whether you’re setting up a new Switch for the first time or helping a friend get online, knowing how to log into your Nintendo Switch account properly can save you headaches and unlock the full potential of your console. This guide walks you through every step of the process, from initial setup to securing your account with advanced security measures, all updated for 2026.
Key Takeaways
- A Nintendo Switch account login enables access to the eShop, online multiplayer, cloud save backups, and exclusive console features that define your gaming experience.
- Create a strong password with uppercase, lowercase, numbers, and symbols, then enable two-factor authentication through the account web portal to protect your digital games and payment methods.
- You can set up up to eight user profiles on a single console, each with independent save files and account settings, and switch between accounts instantly from the home screen.
- Use Nintendo’s web portal to manage account security, monitor linked devices, adjust parental controls, and deregister consoles you no longer own without needing your console.
- If you forget your Nintendo Switch account login password, use the ‘Forgot Your Password’ option on the account website and follow the reset link sent to your registered email address.
- Enable parental controls and set play time limits through the companion smartphone app to give children safe, restricted access to age-appropriate content.
Why Your Nintendo Switch Account Login Matters
A Nintendo Switch account isn’t just a login credential, it’s your digital identity on the console. When you log in, you’re connecting to Nintendo’s network, which enables critical functionality across your gaming experience.
Access to the eShop is tied directly to your account. That’s where you purchase and download digital games, DLC, and seasonal content for your favorite titles. Without a proper account login, you’re limited to whatever physical cartridges you own.
Online multiplayer gaming requires an active Nintendo Switch Online subscription, which is managed through your account. Whether you’re playing competitive shooters or cooperative adventures, your account credentials authorize your access to multiplayer servers.
Save data synchronization is another crucial feature. Your account automatically backs up your game saves to Nintendo‘s cloud servers (with an active Switch Online membership), meaning you won’t lose hundreds of hours of progress if your console is lost or damaged.
Finally, parental controls, achievement tracking, and friend lists all depend on having your account properly configured. Even if you’re a solo gamer, proper account setup ensures your console works exactly as intended.
What You Need Before Logging In
Before you sit down to log into your Nintendo Switch account, gather the essentials. You’ll need an active internet connection (Wi-Fi or docked with wired adapter), a Nintendo Switch console in working condition, and a valid email address to create or access your account.
Creating A New Nintendo Network ID
If you’re new to Nintendo’s ecosystem, you’ll need a Nintendo Network ID. This is separate from your Nintendo Switch Online membership, it’s the foundational account that identifies you on Nintendo’s systems.
You can create a Nintendo Network ID directly on your Switch or through Nintendo’s official website. On the console, navigate to System Settings > Users and Accounts > Add User > Create New User. You’ll be prompted to set up a profile and then link a Nintendo Account (which requires an email address).
The process takes about five minutes. You’ll choose a username, set a password, and verify your email address. Nintendo will send a confirmation link to the email you provide, click it to activate your account. Make sure you use a secure password that includes uppercase letters, numbers, and special characters.
If you already have a My Nintendo account from previous Nintendo services, you can use those credentials directly. Your account is free to create and required for any online functionality on the Switch.
Gathering Your Login Credentials
Before attempting to log in, have your email address and password ready. This is the information you created when setting up your Nintendo Account, not a new password, but the one you established during registration.
If you’re logging into multiple devices (like a console at home and a friend’s console), write down your credentials somewhere safe. Nintendo doesn’t store credentials on the console itself for security reasons, so you’ll need to remember them.
For children’s accounts or parental controls, the parent or guardian’s email and password will be needed. You cannot set up a child account without a verified parent/guardian account first.
Step-By-Step Login Process On Your Nintendo Switch
The actual login process on your Switch is straightforward, but there are different paths depending on whether you’re setting up a brand-new console or adding an account to an existing one.
Logging In With An Existing Account
Start by turning on your Nintendo Switch. On the home screen, select System Settings (the gear icon in the bottom right corner). Navigate to Users and Accounts > Add User. You have two options here: Create New User or Link a Nintendo Account. Since you already have an account, select the option to link an existing Nintendo Account.
The Switch will display a login screen. Enter your email address associated with your Nintendo Account, then your password. This is the email and password you created when setting up your account, not a temporary code or recovery phrase.
After entering your credentials, the console will verify your information with Nintendo’s servers. This requires an active internet connection: if you’re getting connection errors, check your Wi-Fi settings before proceeding. Resources like How-To Geek have detailed networking troubleshooting if you’re having issues.
Once verified, you’ll have the option to set up sync for save data, link a profile picture, and configure other account preferences. You can skip these steps and return to them later, the core login is complete once your credentials are verified.
Your account is now active on this console. You’ll see your profile name on the home screen, and you can access the eShop, online features, and any digital games linked to your account.
Setting Up Multiple User Profiles
One Nintendo Switch console can have up to eight user profiles. This is perfect for households with multiple gamers or if you want separate accounts for online and local play.
To add a second account, repeat the process above: System Settings > Users and Accounts > Add User. You can link a different Nintendo Account or create a local profile without an online account. Local profiles work for local multiplayer and single-player games but can’t access online features or the eShop.
Each profile maintains separate save files for most games. So if you and a friend are both playing The Legend of Zelda: Breath of the Wild on the same console, you each have independent saves that don’t overwrite each other.
To switch between profiles, simply select a different user icon on the home screen. The console remembers login information for all linked accounts, so switching is instant, no re-authentication required for subsequent logins.
Logging In Via Web Browser
You don’t always need your console to manage your Nintendo account. Nintendo’s web portal lets you log in and adjust account settings from any browser.
Head to Nintendo’s official account website and select “Sign In.” Enter your email address and password, the same credentials you use on your Switch. If you have two-factor authentication enabled (more on that below), you’ll be prompted to verify your identity through your phone or email.
Once logged in, you can review and update your profile information, manage your Nintendo Switch Online subscription, check your purchase history, set up parental controls, and adjust privacy settings. This is particularly useful if you need to change your password without access to your console or if you’re managing a child’s account from your computer.
You can also deregister consoles from the web portal. This is important if you’ve sold an old Switch or want to transfer your account to a new device. Deregistering ensures your digital games and save data aren’t trapped on a console you no longer own.
The web interface also displays your currently linked devices. If you see a console you don’t recognize, you can remove it immediately. This adds a layer of security, you always know which devices have access to your account.
Common Login Issues And How To Fix Them
Even straightforward logins sometimes hit snags. Here are the most common problems and how to resolve them.
Forgotten Password Recovery
Forgot your Nintendo Account password? It happens. The recovery process is simple but requires access to your registered email address.
On the Nintendo account website, select “Forgot Your Password?” Enter the email associated with your account. Nintendo will send a password reset link to that email, check your inbox and spam folder. Click the link within the email (usually valid for 24 hours) and set a new password.
Create a strong password: at least 8 characters, with a mix of uppercase and lowercase letters, numbers, and symbols. Avoid using the same password across multiple gaming platforms: if one service gets compromised, you don’t want attackers accessing all your accounts.
If you don’t have access to your registered email address, you’ll need to contact Nintendo Support directly. They can verify your identity through security questions or other methods and help you regain access to your account.
Troubleshooting Connection Errors
If your Switch displays an error message during login, something like “Could not connect to the server”, the issue is usually connectivity-related.
First, verify your internet connection. Go to System Settings > Internet > Internet Settings and run a connection test. If the test fails, restart your router and try again. Most connection issues resolve after a simple restart.
If your internet is working fine but you’re still getting login errors, try these steps in order:
- Clear your console’s DNS cache: System Settings > Internet > Internet Settings > Change Settings > DNS Settings > Clear
- Switch to a wired connection if you have an Ethernet adapter: Wi-Fi can be unreliable in congested networks
- Restart your Switch completely (hold the power button for 10 seconds, select Restart)
- Try logging in during off-peak hours: Nintendo’s servers occasionally experience temporary load issues
If errors persist after these steps, check Nintendo Life for recent service status announcements. They report on server downtime and widespread issues affecting multiple users.
Resolving Account Verification Problems
Sometimes Nintendo flags unusual login attempts as a security measure. If you’re asked to verify your account but haven’t set up two-factor authentication, this might seem confusing.
First, check your registered email address. Nintendo will send a verification code via email. Enter that code when prompted on your console, and your login should complete successfully.
If you’re still having trouble, it might be because your account email address isn’t verified. Log in via the web portal and check your account settings. You should see an option to verify your email if it hasn’t been done already. Click the verification link in the email Nintendo sends, and try logging back into your console.
If you can’t access your registered email (maybe it’s an old address you no longer use), you can update your email address through the web portal before attempting to log in again. But, you’ll need your current password to make this change. If you’ve lost access to both your password and email, contact Nintendo Support for account recovery assistance.
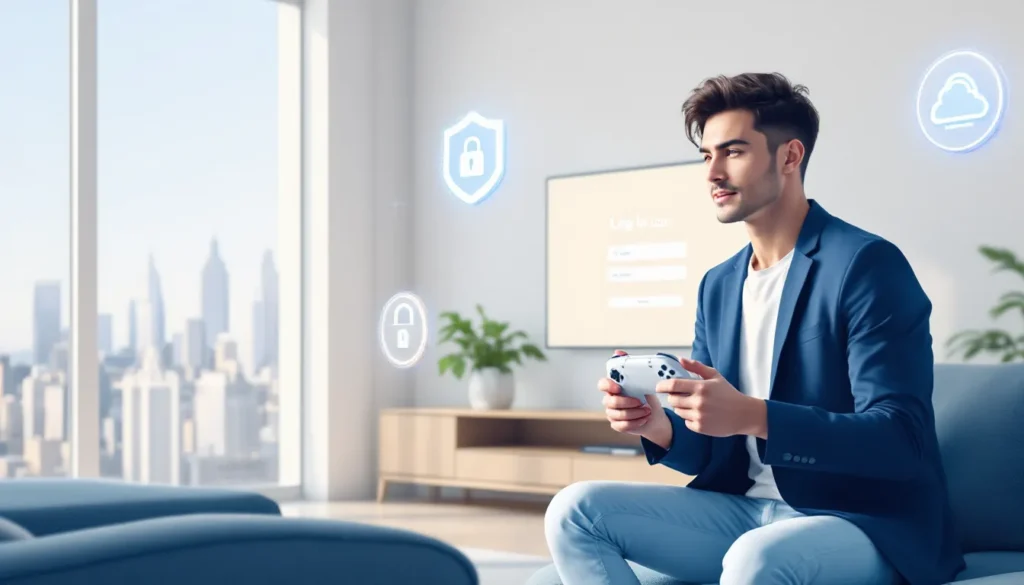
Securing Your Nintendo Switch Account
Your Switch account holds value, it contains digital games, save data, and payment methods. Protecting it should be a priority.
Enabling Two-Factor Authentication
Two-factor authentication (2FA) adds a critical security layer. Even if someone obtains your password, they can’t log into your account without a second verification method.
Enable 2FA through the Nintendo account web portal. Go to Account Settings > Security, then select “Add a sign-in method.” You can choose to receive verification codes via email or through a compatible authenticator app. Email is simpler for most users: authenticator apps (like Google Authenticator or Authy) are more secure but require extra setup.
Once enabled, every login attempt, whether on your console, the web, or a new device, will require entering a verification code. This takes an extra 30 seconds per login but prevents account takeovers.
Write down the backup codes Nintendo provides when you set up 2FA. Store them somewhere safe (not on your Switch). If you lose access to your email or authenticator device, these codes are your only way back into your account.
Best Practices For Account Safety
Beyond 2FA, follow these guidelines to keep your account secure:
Use a unique, strong password. Don’t reuse passwords from other gaming platforms, social media, or email accounts. If one service gets hacked, unique passwords prevent cascading breaches. A password manager like Bitwarden or 1Password can generate and store complex passwords securely.
Don’t share your account. This seems obvious, but many people share accounts with family members or friends. This creates security risks and violates Nintendo’s Terms of Service. Each person should have their own account.
Link a payment method cautiously. If you save a credit card to your Nintendo account for eShop purchases, ensure it has purchase notifications enabled. Check your billing history regularly (visible in the web portal) for unauthorized charges. If you see suspicious activity, remove the payment method immediately and contact your bank.
Monitor your connected devices. The Nintendo account web portal shows every console and smartphone linked to your account. Check this list periodically. If you see unfamiliar devices, deregister them. Remember, anyone with access to a registered console can play your digital games and access your save data.
Avoid public Wi-Fi for logins. Don’t log into your Switch account on unsecured public Wi-Fi. Use your phone’s hotspot or trusted networks only. Public Wi-Fi can be monitored by attackers, making password interception possible.
Enable email notifications. Through the web portal, enable notifications for account activity. Nintendo will email you when your account is accessed from a new device. This alerts you to unauthorized login attempts immediately.
Managing Multiple Accounts And Profiles
Many households run multiple accounts on a single Switch. Understanding how to manage them efficiently prevents confusion and keeps accounts secure.
Switching Between User Accounts
Switching accounts on your Switch is instant. From the home screen, simply select a different profile icon (usually in the top-left corner). The console will immediately load that user’s data, save files, and game library.
Nintendo Switch Online is tied to the account that purchased the subscription, but family plan members share the benefits. If you’ve set up a family group, other members on the same console can access online features, cloud saves, and the eShop using their individual accounts, they don’t need separate Switch Online subscriptions.
Keep in mind that game progress is per-account. If two people are playing The Legend of Zelda: Tears of the Kingdom on the same console, they each have separate save files. Starting a new game on one account won’t affect another account’s progress.
Link digital ownership to prevent confusion. If you purchase a game on Account A, technically only Account A owns it. But, any account on that console can play it. On consoles where Account A is marked as the primary account, other users can play Account A’s digital games. This is Nintendo’s solution to multi-user households without forcing account sharing, but resources like Twinfinite have detailed guides if you’re unsure how your library is set up.
Parental Controls And Child Accounts
Parental controls are essential if children use your Switch. Nintendo’s parental controls system is robust and accessible through both the console and a companion smartphone app.
To set up a child account, navigate to System Settings > Users and Accounts > Add User > Create a Child Account. The parent or guardian must verify their own account during setup. Once created, the child account is restricted, it can’t access certain content without parental approval.
Parental controls let you restrict access based on content ratings. Select which ESRB ratings (E, E10+, T, M, AO) are allowed on the account. Games rated above the set limit won’t launch. You can also restrict online communication, feature limiting multiplayer chat to friends only or disabling it entirely.
Time limits prevent children from playing indefinitely. Set specific play hours and maximum daily playtime. When time expires, the account will lock until the next allowed play window. This is configurable per-day, so you can set different limits on school nights versus weekends.
The parental controls app on your smartphone gives you remote oversight. You can check activity logs, adjust restrictions, and set time limits without being at the console. You’ll also receive notifications if your child attempts to play a restricted game.
Set a PIN code for parental controls. Without it, anyone can change restrictions, which defeats the purpose. Use a code your child won’t guess easily, avoid birthdays or sequential numbers.
Conclusion
Logging into your Nintendo Switch account is the foundation of everything the console offers. Whether you’re jumping into online multiplayer, downloading digital games, or backing up saves, a properly configured account unlocks the full potential of your Switch.
The process is straightforward for first-time setup, but the security and management features deserve attention. Two-factor authentication protects your digital library from unauthorized access. Regular monitoring of linked devices and payment methods keeps fraudsters at bay. Parental controls ensure younger players have a safe, limited gaming environment.
If you’re managing multiple accounts on a single console, remember that each has independent save data, game libraries, and preferences. Family plans make sharing Switch Online benefits seamless across accounts. And if something goes wrong, forgotten passwords, connection errors, or verification issues, Nintendo’s support resources are comprehensive.
Take the time to set up your account correctly from the start. It takes maybe 15 minutes but saves you from hours of troubleshooting down the road. Your digital games, save data, and peace of mind are worth the initial effort.