Running out of storage on your Nintendo Switch? You’re not alone. The console ships with a measly 32GB of internal storage (64GB on the OLED model), which evaporates fast when you’re downloading AAA titles like The Legend of Zelda: Breath of the Wild or Super Smash Bros. Ultimate. A quality microSD card isn’t just a nice-to-have, it’s essential if you want to build a decent digital library without constantly deleting games. In 2026, the microSD card landscape has matured considerably, with options ranging from budget-friendly cards to high-capacity drives that’ll hold your entire game collection. This guide walks you through everything you need to know to pick the right storage expansion, from understanding your Switch’s limitations to actually installing and managing your card like a pro.
Key Takeaways
- A Nintendo Switch microSD card is essential storage expansion since the console’s internal 32GB (or 64GB OLED) fills up quickly with digital games like Zelda: Tears of the Kingdom at 16.3GB or Fortnite at 30GB.
- Choose a 256GB microSD card as the ideal capacity for most players—affordable at $25-40 and offering years of storage without micromanagement of your game library.
- Look for V30 speed class and UHS-I support when selecting a microSD card; reputable brands like SanDisk Extreme, Kingston Canvas, and Samsung Evo Plus offer proven reliability with long-term warranties.
- Install your microSD card by powering off your Switch completely, removing the back panel, inserting the card with gold contacts facing away, and letting the system format it automatically.
- Manage your storage by transferring games directly to the microSD card via System Settings, avoiding hot-swapping, and using the card’s compatibility with the Switch to prioritize it for all new downloads.
- Troubleshoot recognition or performance issues by reformatting the card in the Switch, checking for proper insertion, and ensuring your card meets V30 minimums to avoid slow load times or read errors.
Why MicroSD Card Storage Matters for Nintendo Switch
Understanding Storage Limitations on Your Console
The Nintendo Switch’s internal storage is painfully small by modern standards. The standard model includes 32GB, while the Switch OLED bumped that to 64GB. In real terms, you’re looking at around 26GB and 55GB of usable space after accounting for the system software. That’s enough for maybe three to five mid-sized games before you’re scrounging for space.
Here’s the kicker: the Switch doesn’t let you easily manage storage like phones or computers. You can’t just buy an external SSD and plug it in. MicroSD is your only expansion option, period. Without it, you’re locked into a painful cycle of deleting and reinstalling games, which wastes bandwidth and tests your patience.
The good news? A microSD card solves this entirely. Most Switch owners grab a 128GB or 256GB card and never think about storage again.
Game File Sizes and Digital Downloads
Game sizes on the Switch vary wildly depending on what you’re playing. Indie titles like Hollow Knight weigh in at under 1GB. Meanwhile, major releases have gotten chunky. The Legend of Zelda: Tears of the Kingdom clocks in at 16.3GB. Fortnite needs about 30GB. Grand Theft Auto V requires 90GB if you want the full experience.
If you’re committed to the digital eShop lifestyle, your storage needs climb fast. A player with ten mid-sized games could easily hit 100GB+. Digital purchases have advantages, no cartridge swapping, instant library access, and automatic updates, but they demand space.
The Switch doesn’t support cloud saves for all games (that’s behind Nintendo Switch Online, and it’s limited anyway), so if you’re hoarding multiple save files, that adds up too. When you factor in DLC, updates, and save data, storage becomes a real constraint without expansion.
How Much Storage Do You Really Need?
Calculating Your Ideal Storage Capacity
Figure out your storage needs by asking yourself three questions:
- How many games do you own or plan to own? Count your digital titles. If you’re a collector with 30+ games, you need serious space.
- What’s your game library composition? Mostly indie games (5-20GB each) or AAA titles (20-90GB each)?
- Do you download updates, DLC, and extras? Every update takes space. Smash Bros. Ultimate’s DLC fighters and stages added significant file sizes over the years.
Here’s a quick breakdown:
- Casual player (5-10 games, mostly indie): 128GB gets you comfortable breathing room.
- Regular player (15-20 games, mixed library): 256GB covers you for a year or two.
- Collector/hardcore (30+ games, AAA-heavy): 512GB or larger ensures you never worry.
Don’t just buy exactly what you need right now. Storage is cheap relative to the cost of the Switch itself. Spend an extra $10-20 now to avoid the frustration of maxing out again in six months. Trust us, it’s worth it.
Comparing Storage Tiers: 64GB vs 128GB vs 256GB and Beyond
Let’s break down what each tier actually gives you in practical terms:
64GB MicroSD Cards
- Roughly 55-58GB usable space after formatting
- Holds 3-4 large AAA games or 8-10 indie titles
- Best for: Extremely casual players or as a secondary card
- Verdict: Tight. Not recommended as your primary card in 2026.
128GB MicroSD Cards
- Around 110-115GB usable space
- Comfortably holds 6-8 AAA titles or a balanced 20-game library
- Best for: Most Switch owners
- Verdict: The sweet spot for value and practicality. This is what the average player should grab.
256GB MicroSD Cards
- Roughly 230GB usable space
- Handles 15+ AAA games, or a massive 50+ game indie collection
- Best for: Power users, collectors, and anyone who hates micromanaging
- Verdict: Premium option, but prices have dropped enough that the upgrade is tempting.
512GB and Larger
- Over 450GB usable space
- Theoretical maximum for Switch compatibility is around 2TB, though practical limits hover lower
- Best for: Serious collectors or future-proofing
- Verdict: Overkill for most, but the price premium over 256GB is surprisingly small now.
A player buying in 2026 with any intention of building a library should start at 128GB minimum. If you can swing the extra $15-25, jump to 256GB and call it done.
What to Look for When Choosing a MicroSD Card
Speed Class, UHS-I, and Read/Write Performance
Not all microSD cards are created equal. Speed matters, especially for load times on the Switch.
Speed Class Ratings Explained:
- Class 10 (C10) – Minimum sustained write speed of 10 MB/s. Acceptable but dated.
- U3 (UHS Speed Class 3) – Sustained write speed of at least 30 MB/s. Much better for large file transfers.
- V30 (Video Speed Class 30) – Guarantees 30 MB/s minimum write speed. Solid for gaming.
- V60/V90 – Over-engineered for a Switch. You won’t see practical benefit.
For the Switch specifically, V30 is the practical sweet spot. It handles game installations and file transfers without unnecessary slowdowns. You don’t need bleeding-edge V90 speeds: the Switch isn’t a 4K camera.
Read and write speeds matter too. Faster cards transfer game installations to the Switch quicker. When copying 50GB of games to a new card, the difference between a 90 MB/s write speed and a 150 MB/s write speed genuinely saves time, we’re talking 45 minutes versus 25 minutes.
UHS-I Support: Look for UHS-I compatible cards. The Switch supports UHS-I (up to 104 MB/s), which older cards don’t. UHS-II exists but provides no practical advantage here.
Avoid cards without clear speed specifications or anything slower than V30. Budget brands that don’t list performance details are red flags.
Brand Reliability and Warranty Considerations
MicroSD cards fail silently. You plug it in one day, and it’s unrecognized. That’s a catastrophe if your entire game library’s on there. Brand reputation isn’t just marketing, it’s insurance.
Trusted Brands for the Switch:
- SanDisk – The industry standard. Excellent failure rates and proven track record. Their Extreme line specifically targets gaming.
- Kingston – Solid reliability, good performance, often competitively priced.
- Samsung – Premium option, exceptional quality control. Their EVOs are borderline overkill but dependable.
- Crucial – Reliable and affordable. Less marketing noise, same quality as bigger names.
Warranty Matters:
Reputable brands back their cards with 10-year warranties as standard. That’s not marketing fluff, it reflects confidence in longevity. Dodgy off-brand cards often come with 1-year warranties or vague guarantees. If a company won’t stand behind their product long-term, there’s a reason.
When you’re storing hundreds of dollars’ worth of digital games on a $30 card, a real warranty feels like security. Check the retailer’s return policy too. Amazon and Best Buy make returns painless: sketchy third-party sellers don’t.
Pro tip: Register your card with the manufacturer if they offer it. Some SanDisk cards qualify for extended warranties if registered within 30 days of purchase.
Top MicroSD Card Options for Nintendo Switch in 2026
Premium High-Capacity Choices
SanDisk Extreme microSD UHS-I (256GB and above)
- Read/Write: ~170/90 MB/s
- Speed Class: V30, U3
- Capacity: 128GB to 512GB
- Best for: Players wanting proven reliability and solid performance
- Why it’s good: Specifically marketed for gaming. Warranty is rock-solid. Prices on 256GB have dropped to nearly budget levels.
- Trade-off: Not the fastest write speeds available, but more than adequate for the Switch.
Samsung Evo Plus microSD (256GB and above)
- Read/Write: ~180/140 MB/s
- Speed Class: V30, U3, A2
- Capacity: 128GB to 512GB
- Best for: Power users wanting top-tier performance and future-proofing
- Why it’s good: Faster write speeds mean quicker game installations. Premium build quality. A2 rating helps with app performance (minor benefit for Switch but useful for other devices).
- Trade-off: Premium pricing. You’re paying for speed you’ll barely notice on the Switch, but the quality is undeniable.
Kingston Canvas Go. Plus (256GB and above)
- Read/Write: ~170/90 MB/s
- Speed Class: V30, U3
- Capacity: 64GB to 512GB
- Best for: Players who want reliability without premium pricing
- Why it’s good: Excellent balance of cost and performance. Strong reputation for longevity. Often underrated compared to Samsung/SanDisk but just as dependable.
- Trade-off: Slightly slower than top-tier options, but the practical difference is minimal for the Switch.
Best Budget-Friendly Options
SanDisk Ultra microSD (128GB or 256GB)
- Read/Write: ~120/90 MB/s
- Speed Class: V30, U3
- Capacity: 32GB to 512GB
- Best for: Budget-conscious gamers who don’t want to compromise on brand trust
- Why it’s good: The “Ultra” line sits below “Extreme” but still delivers solid V30 performance. Prices are incredibly competitive, especially during sales.
- Trade-off: Slightly slower read speeds than Extreme, but you won’t notice in daily use. The V30 write speed is consistent.
Crucial microSD (128GB or 256GB)
- Read/Write: ~160/140 MB/s (newer models)
- Speed Class: V30, U3
- Capacity: 64GB to 512GB
- Best for: Players wanting good performance without the brand premium
- Why it’s good: Crucial’s managed to deliver strong speed numbers at budget prices. Overlooked but genuinely competitive. Good warranty backing.
- Trade-off: Less marketing presence means fewer people know about them, but that’s mostly irrelevant to actual quality.
PNY Elite-X microSD (128GB or 256GB)
- Read/Write: ~100/90 MB/s
- Speed Class: V30, U3
- Capacity: 64GB to 512GB
- Best for: Strict budget shoppers needing basic reliability
- Why it’s good: Cheap without being sketchy. V30 certified. PNY’s been around forever and still honors warranties.
- Trade-off: Slower read speeds mean slightly longer game installation times. Not a deal-breaker, just slower.
Mid-Range Performers Worth Your Investment
Western Digital SanDisk Extreme (128GB or 256GB)
- Read/Write: ~170/90 MB/s
- Speed Class: V30, U3
- Capacity: 64GB to 1TB
- Best for: Players wanting the SanDisk name without going full premium
- Why it’s good: Sits perfectly between Ultra and high-end Extreme. Still gaming-focused. Better speeds than Ultra at a modest price bump.
- Trade-off: You’re essentially paying for the SanDisk reputation, which is fair if you value that.
Lexar Professional 1000x (128GB or 256GB)
- Read/Write: ~150/90 MB/s
- Speed Class: V30, U3
- Capacity: 32GB to 512GB
- Best for: Gamers wanting a step up from budget brands but not paying premium prices
- Why it’s good: Lexar’s made a comeback with solid products. Good speeds for the price. Reasonable warranty. Often on sale.
- Trade-off: Less mainstream than SanDisk or Kingston, but quality is genuinely there.
Kingston Canvas Select Plus (128GB or 256GB)
- Read/Write: ~165/100 MB/s
- Speed Class: V30, U3
- Capacity: 64GB to 512GB
- Best for: Balanced buyers seeking value and reliability
- Why it’s good: Kingston’s mid-range offering hits the sweet spot. Strong performance, trusted brand, competitive pricing. Often overlooked in favor of Canvas Go. but nearly as good.
- Trade-off: Slightly slower than Go., but the price difference might not justify Go. for most Switch owners.
Buying Recommendation for 2026:
For most players, grab a 256GB SanDisk Extreme or Kingston Canvas Select Plus. You’ll spend $25-40, get reliable performance, and solve storage issues for years. If budget’s tight, SanDisk Ultra 128GB is the floor. If you want the absolute best, Samsung Evo Plus 256GB is worth the extra cost.
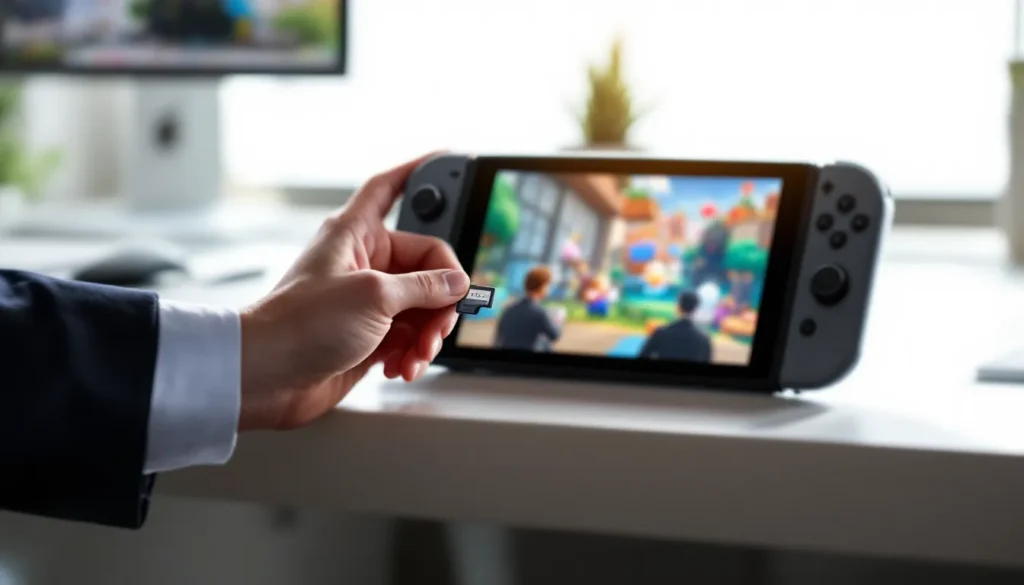
How to Install and Manage Your MicroSD Card
Step-by-Step Installation Guide
Installing a microSD card in your Switch is straightforward, but there are details worth getting right.
What You Need:
- Your microSD card (obviously)
- Your Nintendo Switch
- Optional: a small Philips screwdriver (the cartridge slot has a tiny screw, but most don’t bother with this)
Installation Steps:
-
Power off your Switch completely. Don’t just put it in sleep mode. Full shutdown. This prevents any weird data corruption issues.
-
Locate the microSD card slot. On the standard Switch and OLED, it’s on the back, accessible from the bottom. You need to remove the back panel first.
-
Gently pull the back panel. Start at a corner and work your way around. It’s just clipped on: no screws. Don’t force it, it’ll pop off with light pressure.
-
Insert the microSD card into the slot. The gold contacts face away from you. You’ll hear a quiet click when it seats properly. Don’t jam it in: it should slide smoothly.
-
Snap the back panel back on. Align the corners first, then press firmly until you hear the clips engage. Make sure it’s flush all the way around.
-
Power on your Switch. The system will recognize the new card automatically. You might get a notification asking to format it, say yes. Formatting takes seconds and prepares the card for use.
That’s it. The card is ready to go. You can now download games directly to the card, and the Switch will prioritize it for new installations.
Transferring Games and Managing Files
Once your card is installed, you’ll probably want to move existing games to it. The Switch has built-in tools for this, but the process isn’t super obvious.
Transferring Games to Your New Card:
-
Go to System Settings → Data Management → Move Software. This is the official way to relocate games.
-
Select the game(s) you want to move. You can pick multiple titles at once. The system will show how much space each needs.
-
Choose your microSD card as the destination. If you only have one card, this is automatic.
-
Confirm and wait. Transfer speeds depend on your card’s performance. A 20GB game on a V30 card typically takes 5-15 minutes.
Managing Space Going Forward:
-
Install directly to the card. Once it’s inserted, new downloads automatically prioritize the microSD card. You’ll rarely use the internal storage again.
-
Check remaining space. Go to System Settings → Data Management → Manage Software to see what’s taking up room. You can delete games here without hunting through folders.
-
Archive vs. Delete: The Switch lets you “archive” games, which removes them from your console but keeps save data. Re-downloading takes time but saves space temporarily. For long-term storage, just delete and re-download later.
-
Don’t hot-swap cards. Power down before removing or inserting cards. Doing it while the system’s on risks data corruption.
Pro Tips:
-
If you’re adding a second microSD card (yes, you can only use one at a time, but you can swap), format it in the Switch rather than on a computer. This ensures compatibility.
-
Keep your save data on the internal storage if possible. While most modern games are cloud-backed via Nintendo Switch Online, local saves are still safer.
-
If you’re constantly near your storage limit, that’s a sign you need a bigger card, not more active management. Future-proof yourself.
Common MicroSD Card Issues and Troubleshooting Tips
Recognition Problems and Compatibility Issues
Sometimes your freshly installed card just won’t work. The Switch won’t recognize it, or you get error codes. Here’s how to fix it.
Card Not Recognized:
-
Reformat the card in the Switch. Go to System Settings → Data Management → Manage microSD Card → Format. This wipes the card and sets it up for Switch compatibility. Only do this if the data’s already backed up (or you’re fine losing it).
-
Check for proper insertion. Remove and reinstall the card. Make sure it clicks into place. Even a slightly loose card won’t register.
-
Try a different card if possible. If a friend’s card works in your Switch, your new card might be defective. Request a return from the retailer while still within the return window (usually 30 days).
-
Update your Switch system software. Older firmware occasionally has microSD compatibility quirks. Go to System Settings → System → System Update and check for new versions.
Compatibility Notes:
The Switch officially supports microSD cards up to 2TB, though practically speaking, cards larger than 1TB are rare and often overpriced relative to what you actually need. Any reputable V30 card will work. Brand doesn’t matter, Samsung, SanDisk, Kingston, Crucial, whatever. If the card is recognized but repeatedly fails, it’s usually a hardware defect, not a compatibility issue.
Data Corruption During Transfers:
If a game file gets corrupted mid-transfer (rare but happens), you’ll see error codes like 2110-1204. The fix:
- Delete the corrupted game data from your console.
- Reformat the microSD card.
- Re-download the game fresh.
This is annoying but ensures a clean installation. Don’t try salvaging corrupted files, it’ll cause more problems.
Slow Performance and Read Errors
Your card works, but games load like you’re playing on a potato. Or you’re getting read errors during gameplay. These issues are usually fixable.
Slow Game Performance:
-
Inadequate card speed. If you grabbed a card slower than V30, you’re hitting the ceiling. Modern games expect V30 minimum. Upgrade to a proper card if you’re using something ancient.
-
Fragmentation. MicroSD cards fragment over time, especially with lots of game installations and deletions. Format the card and re-download games. It’s tedious but works.
-
Card degradation. MicroSD cards do fail gradually. If you’re getting consistently slow speeds after a year or two, the card might be aging out. Most last 5+ years, but degradation happens.
Read Errors Mid-Game:
-
Loose card connection. Even a slightly unseated card causes read errors. Power down, pop the card out, inspect the contacts for dirt or debris, clean gently with a soft cloth, and reinsert firmly.
-
Faulty card. Some cards have defective sectors. If errors persist across multiple games, the card itself might be bad. Contact the manufacturer with your purchase proof. They’ll usually replace it under warranty.
-
Switch hardware issue. Rarely, the Switch’s card slot itself gets damaged. If a known-good card still causes errors, contact Nintendo support. This is covered under warranty in most regions.
Error Codes and What They Mean:
- 2110-1204 – Corrupted game data. Delete and re-download.
- 2110-1250 – microSD card error. Reformat the card.
- 2001-0123 – Corrupted save data. More serious: try restoring from the cloud if you’re subscribed to Nintendo Switch Online.
Prevention is easier than fixing:
- Always power off before removing the card.
- Don’t expose the card to extreme temperatures or moisture.
- Buy from reputable retailers with return policies.
- Keep your Switch software updated: Nintendo releases patches for card compatibility sometimes.
Maximizing Your Switch Experience with the Right Storage Solution
A good microSD card transforms how you use your Switch. Instead of worrying about space every time you see a game you want, you just download it. Instead of shuffling game cartridges around, your entire library is ready instantly.
The key is matching your card to your habits. A casual player grabbing one game a month needs less storage than someone buying three games a week. A collector chasing every Nintendo franchise entry needs more than someone who rotates through five favorite titles.
In 2026, storage costs have plateaued at friendly prices. A 256GB card, enough for virtually anyone, runs $25-40. That’s arguably the best value in Switch accessories right now. Compared to buying a second console or re-purchasing games physically to manage space, it’s the obvious choice.
Speed matters less than capacity, but the difference between a V30 card and a slower alternative is noticeable when installing a 30GB game. Fast cards shave 10-15 minutes off installation time, which adds up if you download games frequently.
Brand reliability is worth paying for. A dead card doesn’t just cost you the replacement: it wastes time and bandwidth re-downloading games. SanDisk, Kingston, and Samsung have earned their reputation by not failing when it counts. Saving $5-10 on an off-brand card that dies in a year is false economy.
Finally, don’t wait until you’re completely out of space to think about expansion. By that point, you’re stuck either deleting games or paying for faster (and pricier) cards out of desperation. Buy the card now, format it, and set it up while you have time. Your future self will thank you when you’re not managing storage every other week.
Conclusion
A microSD card isn’t a luxury for Nintendo Switch owners anymore, it’s essential infrastructure. Whether you’re building a digital library, jumping between games without the cartridge shuffle, or just want breathing room on your console, the right card makes it all frictionless.
Start with a 256GB card from SanDisk, Kingston, or Samsung. You’ll spend less than a new game, solve storage problems for years, and won’t regret the decision. If budget’s the constraint, a 128GB card is the minimum to avoid constant management. Avoid anything slower than V30 or from brands without established track records, the time you save and the peace of mind you gain are worth the modest price difference.
Format it properly, install it correctly, and you’re done. Your Switch just became a device you can actually enjoy without worrying about space. That’s the whole point.